By The Skin Of My Teeth - Nose Cone Update...
I leave tomorrow for a trip to Indonesia and really wanted my long Mirage to work but the nose cone kept leaking. After spending two days trying way too many o-rings (I must have had the gun taken apart, reassembled and pumped back up at least 20 times by now) I decided to go down a different path.
Since two of my three Mirage nose cones leak by the mere sight of a pump I thought I might as well try something rather drastic.
While the wall thickness on the cone just under the pumping barrel is really thin (0.6-1.4mm) there is quite a lot of material at the front end of the hole. Since my issue is that the o-ring seat is in bad shape, I came up with drilling it out as well as making the seat deeper (protruding more forward).
It took some careful measuring and a bit of panic/courage before closing time to decide on the drilling. But on the other hand, I think this nose cone is a dud anyways.
I needed some way of mounting the cone for the drilling operation. I made a fixture which is just a rod held in a tool holder:

The cone mounts on the rod with a tight press fit:

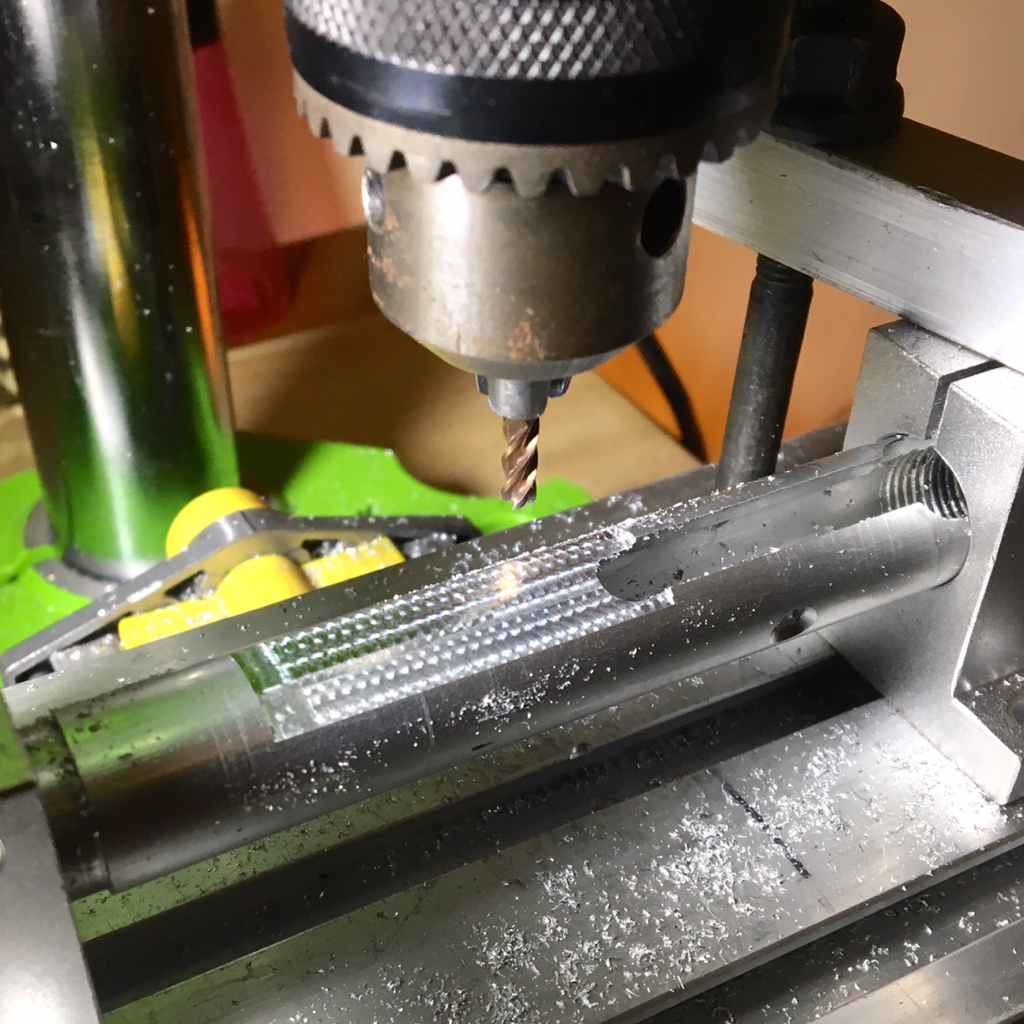
After lining it up on the tool post, I set about drilling out the bore (Yeah, the lathe is messy, been too busy to tidy it up):

It's a bit hard to see what I did, but I drilled out a 12mm bore to 13mm and went about 3mm deeper:

This gave me a new and much longer bore to seal against. I should have done this with a reamer - the bore would have been smoother - but I didn't have any in the right size and no time to get one.
I made some new dummy plugs to test if this nose cone mod would work. Thing is, I would need to make a whole new pumping barrel to fit this new bore, so better to test first. (Black dummy plug was from yesterday when I was still trying to make the un-modified cone work. The white delrin and alu ones are specific to the modded cone):


As I have done in some other of my mods and designs lately and as the dummy plugs show, I also wanted to squeeze in two o-rings. The longer bore made this possible. And since the OD of the pumping barrel dummy is now 1mm larger I also have a deeper o-ring seat which helps keep the o-rings from pinching and extraction.
And now the drum roll... it worked! The gun has been up to 35 bar with the alu plug and it's all good.
Side note: If for some reason, I want to pull out the pumping barrel and convert the Mirage to a fancy looking Sten, I just need to leave this plug in;-)
Last step was to make make a new pumping barrel, a few mm longer, with the new o-ring groove dimensions at the front. Now, I didn't have 14x10mm alu tubing in stock but my girlfriend called a metal shop in town and had a delivery guy deliver two 1m alu tubes in 30mins for about USD 8 total (on a Sunday!). Sometimes, you gotta love China;-)
With all the time I have spent on the lathe lately I made the new pumping barrel pretty fast. My new barrel at the bottom with an original one at the top:

And second drum roll; it even held air fully assembled with the new pumping barrel in it;-). Also, the pre-pumping function is working without any leaks.
I leave tomorrow for a trip to Indonesia and really wanted my long Mirage to work but the nose cone kept leaking. After spending two days trying way too many o-rings (I must have had the gun taken apart, reassembled and pumped back up at least 20 times by now) I decided to go down a different path.
Since two of my three Mirage nose cones leak by the mere sight of a pump I thought I might as well try something rather drastic.
While the wall thickness on the cone just under the pumping barrel is really thin (0.6-1.4mm) there is quite a lot of material at the front end of the hole. Since my issue is that the o-ring seat is in bad shape, I came up with drilling it out as well as making the seat deeper (protruding more forward).
It took some careful measuring and a bit of panic/courage before closing time to decide on the drilling. But on the other hand, I think this nose cone is a dud anyways.
I needed some way of mounting the cone for the drilling operation. I made a fixture which is just a rod held in a tool holder:
The cone mounts on the rod with a tight press fit:
After lining it up on the tool post, I set about drilling out the bore (Yeah, the lathe is messy, been too busy to tidy it up):
It's a bit hard to see what I did, but I drilled out a 12mm bore to 13mm and went about 3mm deeper:
This gave me a new and much longer bore to seal against. I should have done this with a reamer - the bore would have been smoother - but I didn't have any in the right size and no time to get one.
I made some new dummy plugs to test if this nose cone mod would work. Thing is, I would need to make a whole new pumping barrel to fit this new bore, so better to test first. (Black dummy plug was from yesterday when I was still trying to make the un-modified cone work. The white delrin and alu ones are specific to the modded cone):
As I have done in some other of my mods and designs lately and as the dummy plugs show, I also wanted to squeeze in two o-rings. The longer bore made this possible. And since the OD of the pumping barrel dummy is now 1mm larger I also have a deeper o-ring seat which helps keep the o-rings from pinching and extraction.
And now the drum roll... it worked! The gun has been up to 35 bar with the alu plug and it's all good.
Side note: If for some reason, I want to pull out the pumping barrel and convert the Mirage to a fancy looking Sten, I just need to leave this plug in;-)
Last step was to make make a new pumping barrel, a few mm longer, with the new o-ring groove dimensions at the front. Now, I didn't have 14x10mm alu tubing in stock but my girlfriend called a metal shop in town and had a delivery guy deliver two 1m alu tubes in 30mins for about USD 8 total (on a Sunday!). Sometimes, you gotta love China;-)
With all the time I have spent on the lathe lately I made the new pumping barrel pretty fast. My new barrel at the bottom with an original one at the top:
And second drum roll; it even held air fully assembled with the new pumping barrel in it;-). Also, the pre-pumping function is working without any leaks.
Last edited: