• Welcome to the DeeperBlue.com Forums, the largest online community dedicated to Freediving, Scuba Diving and Spearfishing. To gain full access to the DeeperBlue.com Forums you must register for a free account. As a registered member you will be able to:

    • Join over 44,280+ fellow diving enthusiasts from around the world on this forum
    • Participate in and browse from over 516,210+ posts.
    • Communicate privately with other divers from around the world.
    • Post your own photos or view from 7,441+ user submitted images.
    • All this and much more...

    You can gain access to all this absolutely free when you register for an account, so sign up today!

First build Teak blank ,few questions

Thread Status: Hello , There was no answer in this thread for more than 60 days.
It can take a long time to get an up-to-date response or contact with relevant users.

Will Read

Well-Known Member
May 8, 2012
317
75
68
Ive just bought some nice Teak with a view to making 1 laminated gun and hopefully a short solid teak gun. Ive done a fair bit of research and am gradually building up a process of the bits/tools I need and techniques for this process. I have a couple of questions that are bothering me . Number 1 - I am worried about the alignment of the shaft in its track and the trigger mechanism . The left to right issue seems fairly easy ,just change router bits and don't move router so the centre of the mechanism pocket is exactly centre of your track . The bit that concerns me is the height of the mech against the shaft track ,I guess there is not much room for tolerance and the shaft must enter/exit the mech at just the right place in terms of the height up and down . Is there a specific technique for getting this right ? Also should the mech be floating in the pocket on the pins? or wedged in the pocket tight and pinned ?
Number 2 - any screws I fix into the stock for hardware , do I need to drill a hole and epoxy it then put the screw in , to stop water getting deep into the stock?
Number 3 What tools do I need , obviously in an ideal world I would have a full workshop at my disposal but I want to know what I can get away with . My list for things I feel I definitely need are ; Table saw for taper cuts(I will make a jig) Router for mechanism pocket and shaft track and rounding the blank edges and cutting band holes , Decent mortice chisel and paring chisel for squaring corners of my routered pockets , Dremmel multi tool with sanding attatchments and palm sander for finishing , Pillar drill for drilling holes to pin the trigger mechanism. And lastly a belt sander to shape the stock around the butt to make a kind of loading pad fluke tail sort of thing , I don't know how feasible it would be to remove 10mm from each side of the blank with a belt sander in terms of how long it would take and accuracy ,?? Would I be better rough chiselling these concaves and then sanding . Idealy id buy a bandsaw but im already spending a couple of hundered on tools so I can justify everything,i have a jigsaw but im thinking it may be a bit thick and hard to get through?, these guns will cost me twice what I could buy them for likely !
All advice graciously accepted , Thanks , these are not going to be big bluewater cannons with 3 or 4 power bands but slim manoeuvrable guns , most likely a 78cm and a 92cm roughly with single bands and 6.5mm shafts for typical light uk fishing in North wales .
 
Don't go buying power tools if you don't have to ! I have router,Sander, jig saw,and cross cut power saw if you won't them for your project!How big is your bit of teak?
 
Don't go buying power tools if you don't have to ! I have router,Sander, jig saw,and cross cut power saw if you won't them for your project!How big is your bit of teak?
Thanks Ian, il let you know if I need any bits, there are a few carpenters I can speak to at work too so shouldn't need to spend to much. I have a few pieces, longest is 220cm by 36 mm square. I have enough for about 4 guns!really nice stuff with tight straight grain
 
I have managed to build all my guns with basic hand tools & a few hand power tools but that is just my style.
You can make the centre laminate 2mm wider than the trigger unit and pre fit the unit before gluing up.
You should seal any fixings with either epoxy or silicone but the only real benefit of using teak is the woods high oil content that repels water ingress (and sometimes epoxy glue) so a dab of silicone is fine.
You could also leave the centre laminate down below the outside laminates so you can then fill with epoxy & sink in a waxed steel rod to form the track.
 
Don't go mad on the power tools. A rasp is a great tool for shaping. If you want to have say a wider muzzle or trigger area add laminates in that area only. Like Foxfish says I make the Center lamination the same size or slightly larger than the trigger and cut to its final length. It's at this point I rout the rail groove before gluing up.Then make the next outer laminations the total length of the gun and glue up flush at the front.There will now be a gap behind the rail the same width as the trigger. The space behind the trigger can then be infilled with another piece of wood and/or the tenon from the handle. Et voila, a perfect trigger pocket. Hope this makes sense?
 
  • Like
Reactions: Youssef Sammour
Don't go mad on the power tools. A rasp is a great tool for shaping. If you want to have say a wider muzzle or trigger area add laminates in that area only. Like Foxfish says I make the Center lamination the same size or slightly larger than the trigger and cut to its final length. It's at this point I rout the rail groove before gluing up.Then make the next outer laminations the total length of the gun and glue up flush at the front.There will now be a gap behind the rail the same width as the trigger. The space behind the trigger can then be infilled with another piece of wood and/or the tenon from the handle. Et voila, a perfect trigger pocket. Hope this makes sense?
Yes this makes perfect sense , very good idea . I now have a router which was a Christmas gift .Just need to work out what size roundover bits to get for shaping the corners and what ball cutter size to do the track . Originally I thought of a handle frame with side stocks but prefer the idea of shaping and gluing in one myself. Is a rasp the same as a riffler file ?
I am planning 3 laminations for my short 80cm gun , after its all laminated , will a standard cheapish bench saw be ok for getting it totally square before cutting the track ? Also im planning on finishing all areas of the gun with this stuff http://www.marineteak.co.uk/semco-teak-sealer-6-c.asp apart from the trigger pocket which I will use a penetrating epoxy for as I don't want to be knocking the mech out every year when I re apply the sealer , and also possibly the spear track I might use a penetrating epoxy as I figured this could add durability as the shaft constantly rocketing down could abrade the teak sealer off. Any one any thoughts ? Also what length spear am I looking at for an 80cm gun , what is the optimum overhang to have on the spear?? Also im thinking of a top release reverse mech , or possibly side release . Thanks everyone who has given advice , all very usefull
 
image.jpg
 
That's excellent , very good link to that build, that's exactly the kind of gun I want to end up with . I have got table saw,router , rifflers, rasps,jigsaw, dremmel tool , palm sander , chisel , Japanese curved wood carving knife. So just need my router bits really I think , don't think I will bother with a router table , just thinking of making two deep fences to run the router in between or make a fence and use the router guide.
My hardware is on order , reverse mech from speardiver in US , takesEuro shaft with line attatched at the back . Got tigger guard and line anchor from there too all stainless. So next job is rip the teak and glue up the blank when I get chance, got some west systems 105/205.
Im thinking of using two big straightish bits of timber on the outside and then speed clamp those instead of straight to the teak. I guess I just clamp the speed clamps as tight as I can with one hand ? Do I need to worry about overspill with the epoxy ? Also I am thinking the garage may be too cold for the epoxy to cure with it being pretty much 0 deg ! but I don't really want to do it in the house , does this stuff stink ? is it harmfull ? Thanks
 
It doesn't smell too bad but you can always keep the wood and glue warm inside then glue up and leave in the garage, should be ok. Don't over cramp when using epoxy or you'll drive all the glue out of the joint. I use a length of angle iron to clamp to to keep it straight.
 
ok I have ordered most of the stuff I need to make two guns . But I haven't actually started the build yet. Next week I will cut and glue up the first shorter blank using 3 laminations pre-cutting the centre one for the trigger mech. My overall dimensions of the blank would be 36mm x36mm .I know this sounds pretty small but I plan my finished dimensions to be roughly 30mm by 30mm . Or do I need to make the starting blank bigger as I know I will loose some getting it cut perfectly straight and then rounding over etc.
 
Do you have some scrap timber, cheap pine perhaps ? Mock up a blank, make your cuts and get a feel for the finished shape.
 
Thanks yes I will do that definitely with some pine. Also in terms of cutting the track how much of the shaft should sit in the track, I'm guessing just the bottom half. I am using a 6mm shaft so I guess a 6.3 mm core box router bit??
Amazon product
 
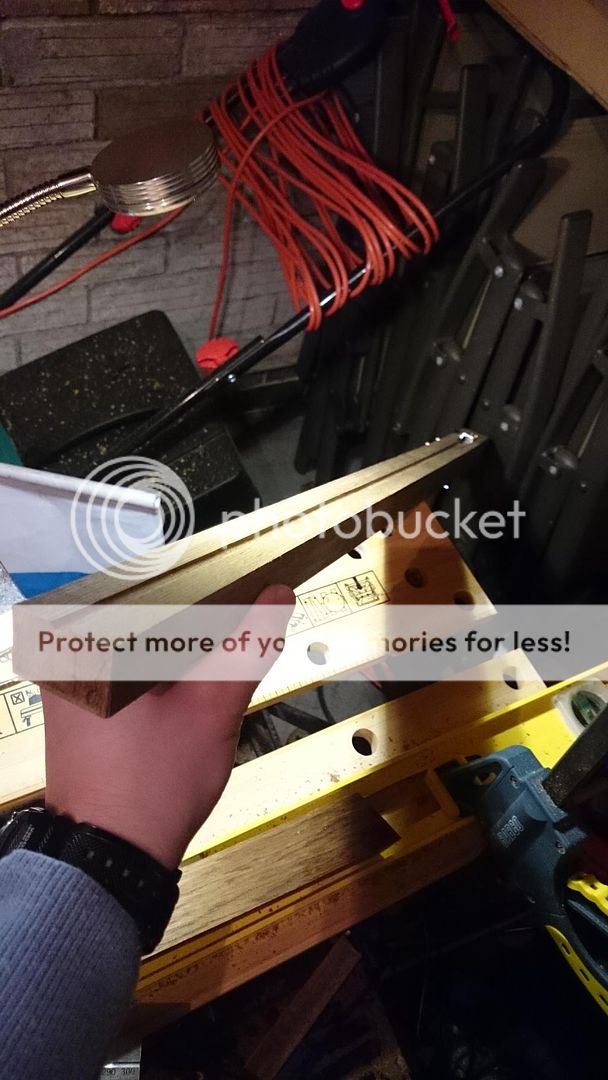
So ive made a start to my first gun . Its roughly 80cm from back of trigger mech to the end , I have managed to get the reverse mech in and cut a track . The teak was a solid piece that had been stored inside for 3 months and didn't really warp at all. Im fairly happy with the gun so far , although its not really a perfect job as im sure the more observant of you will see! Just need to thin it down and round over the edges and stick a handle on it and a hole for the bands, It will fire a 115mm shaft , 6.5mm with 17mm band.
Note the horrible chunk missing from the trigger pocket hole, I realized a router carries on spinning for some time after you have let off the power ! So best to keep it still rather than try and pull it out of the hole !!


My plan for the handle is to jigsaw a rough shape and then just carve it down with chisels/knife and rasps to nice shape.I will insert it onto the gun by routering a 1" recess and jam it in that way , and I wont epoxy it in until im sure the gun shoots straight ,if it doesn't I will be able to use the handle for another gun.
 
By the way , does anyone have any ideas for fixing my mistake with the router?! I was thinking maybe cut a more definite square piece out where the damage is and epoxy a piece of teak in and sand it down ??
 
image.jpg
Will can you router out a small part where damaged is to make it look like this it hard to draw just a matching 7.3mm bit each side
 
Thanks Ian that is an option, but don't really want two gaps at either side of the mech, I may end up just trying to round over the edges or something. Failing that I will stick a piece in.
 
I ended up using a 7mm ball end router bit so track was 7 wide and about 5 deep, I will line it with a thinned bit of epoxy and it should be OK with the 6mm shaft I will use
 
DeeperBlue.com - The Worlds Largest Community Dedicated To Freediving, Scuba Diving and Spearfishing

ABOUT US

ISSN 1469-865X | Copyright © 1996 - 2024 deeperblue.net limited.

DeeperBlue.com is the World's Largest Community dedicated to Freediving, Scuba Diving, Ocean Advocacy and Diving Travel.

We've been dedicated to bringing you the freshest news, features and discussions from around the underwater world since 1996.

ADVERT