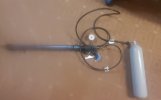
When you release air from the gun - what do you do? You take a piece of hard wire or a nail and push the pin in the valve to release air. A very minimal effort is required because the surface area is tiny.
[EDIT]...
Ah, I see what you are saying and we have been talking about two different things. But they are connected.
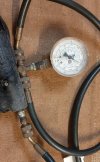
Hear me out. While it might not take much force to open the valve itself, what happens in the moment you do that is that air will rush out of the gun into the bigger space between the valve and the front of the gauge. The pressure will reach an equilibrium with the pressure inside the gun and the gauge will stop to rise. But this space has a bore of Ø10mm, and at 20 bar that will result in around 16kgf of force wanting to spit the gauge back out. At 40 bar, it is double that. That's what I have been babbling on about
")